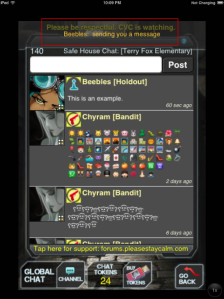
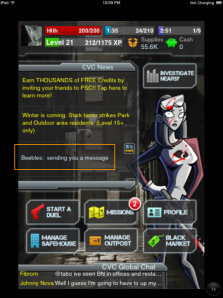
In a previous posting I outlined the benefits of having a unique avatar image, either one to yourself or one that links you with your safe house. If you have not seen that posting or would like to review it you can find the posting HERE. I have seen people in Global Chat request help on how to show their own unique avatar images. I’m going to provide a tutorial on how to use Foursquare to do just that. There is also the option of using Facebook, however I have heard this possibility comes with more bugs than the Foursquare option and personally I do not have a Facebook account I can use the demonstrate the full steps involved. I will in the tutorial point out the option for Facebook but not provide the full steps involved in using Facebook.
Phase One – Choosing Your Avatar Image
To get your unique avatar image will take a few steps. You’ll first need to find the picture you would like to use. There are many avatar friendly sites, or you can create your own through cropping a part of an image. I recommend getting an idea of how it will appear by observing the image when it is 150 x 150 pixels in size. That will give you a rough idea as to how clear it would appear on an iPad. It will be even smaller on an iPod or iPhone which you can get a better idea at if you reduce to 50 X 50 pixels. (The size on the iPad will be smaller than 150 x 150 pixels but I feel that I can still manipulate and changes at that size while having a reasonable expectation as to the end result.)
Ultimately if that seems complicated to you I recommend either appealing to a safe house friend for help in finding or creating an image, or going to one of the many avatar sites and picking one of the many options located there.
If you want more of a challenge I would recommend Photoshop for manipulating your image, or if you wish for the free alternative Paint.Net. (See link for free download)
Phase Two – Making Your Foursquare Account (It’s Free!)
Step One:
Go to Foursquare located at: https://foursquare.com/
Step Two:
Click on the Login Button located at the top. See the example for the grey button in the red square.

Step Three:
If you already have a Foursquare account login here. If you don’t have an account, select the hyperlink shown in the example in the red box with the label “Sign up for foursquare”. (Again, this is free!)
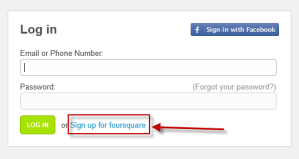
If you believe you have an account and attempt to login but get the following error message:

You can try again, or you can use the “Forgot your password?” hyperlink in grey. That will send you to a page where you can have Foursquare email you with recovery information to reset your password.
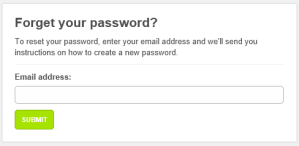
Step Four:
If you have signed into your Foursquare account please skip down to Step Five.
Now that you are signing up for Foursquare you have two options. You can pick to sign up with Facebook (see green arrow) or with Email (see orange arrow). Again I will not be presenting the Facebook option. If you wish to follow this tutorial select “Sign up with Email” located where the orange arrow in the example is displayed.

You’re now at the Sign up page (which also has a Login option in case you suddenly remember you do have an account.) Fill in the fields noting that your phone number is optional. Selecting the Browse button allows you to find the picture you wish to use for your avatar image. (See red arrow in example) Once all fields have been filled out click the big green button that says “Join”. (See red box in example)

Step Five:
The next steps let you tailor your Foursquare account. If you’re only interested in using this for the game, use the handy “Skip This Step” button located at the bottom followed by the “OK! I’m Done!” button on the next page. Feel free to browse your options here if you wish to use the Foursquare account for other activities.


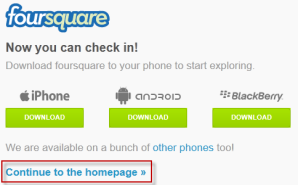
You’ll know find yourself on the final page before your Foursquare homepage. Here you can find a number of options to download apps for your phone. Again this is not necessary for Please Stay Calm but feel free to play with these as you wish. I have not used any and cannot speak to their benefits. If you wish to stay focused on the original purpose click on the hyperlink “Continue to the homepage”. (See red box in example)
Phase Optional – Editing Your Foursquare Avatar
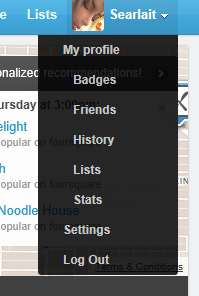
If you don’t like the avatar image or wish to change it later on all you have to do is login and come to your homepage in Foursquare. From here click on your name for the drop down menu and select “My profile” located at the top.
Looking at your profile you will see a larger version of the current image along with your account name and the location of where you are. (This is blocked in my example by the image of a key to preserve my privacy.) Place your mouse over the image and it will change. A black box with the word “Change?” will appear over top the left top corner. Click on the image at this time.


You will again be looking at your settings for your profile. Here you can change various set options, including the image using the Browse button. When you are finished find the big green button at the bottom that is called “SAVE CHANGES” and select it.


Phase Three – Connecting Please Stay Calm Account to Foursquare Account
This is the easy part but comes with a few possible glitches that I will try to outline.
Step One:
Go to your Profile. You can do this from the main page by clicking on the Profile button located here in the example beneath your character’s larger image. (See the HERE! Text bubble)

Step Two:
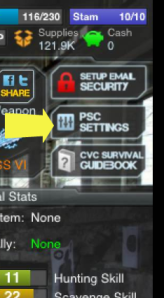
Go into your PSC Settings option. This is located between the Setup Email Security button and the CVC Survival Guidebook above your skills experience bars. (See Yellow Arrow)
Step Three:
In your settings there is a section called “Social”. Here you can login directly to your Facebook account. I do not recommend this option as I have heard from others that it is more likely to case glitches in showing your avatar image. However that option is there should you choose to use it.
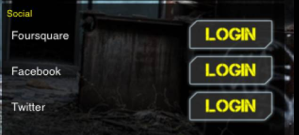
You will notice there is also a Foursquare option. Click on the Login button. If this is your first time logging in you will be given a screen to enter your username (the email address you used) and your password. This will link your Foursquare account with this instance of Please Stay Calm. It is very important to understand what this means. You cannot logout of Foursquare and log back in with a different Foursquare account unless you delete the app, reinstall it and then connect using the same character name. Otherwise anytime you attempt to login you will be auto logged with the previous settings noted. This could have to do with a connection to having Game Center linked to Please Stay Calm, however this was my own personal experience this week while making changes to my accounts. I do not recommend deleting the app if you can avoid it.
When logged in you will see a green checkmark beside the setting and the login button will become a logout button.

Step Four:
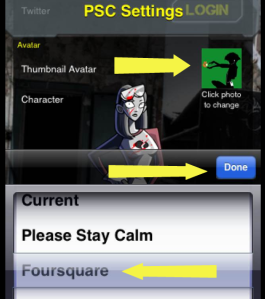
This is your final step. (As long as there’s no glitches!) Click on your Avatar image at the bottom of your PSC Settings. You will see three options (more if you’re logged into more than Foursquare). The Current option is the avatar you are displaying. Please Stay Calm is the avatar you default to or your character in the game. If you’ve logged into Foursquare it appears on this list. Select Foursquare and the avatar image above will change. Click on Done and it will be saved.
Known Glitches:
- After changing your avatar image it may take up to twenty four hours for some people to see the change. Workaround: Be patient and wait for the twenty four hour mark.
- After changing your avatar image it is possible that the program gets confused and loses the connection with Foursquare. Workaround: If this occurs you will notice that your image is static when you check your PSC settings where you would select your avatar image. Confirm you are logged into Foursquare and reselect Foursquare as your avatar image choice.
- Foursquare is not controlled by the developers of PSC and can have its own issues. I had one previous situation where Foursquare forgot one of my three accounts. Workaround: create a new account. I had to delete the app and reinstall to connect my one character account to the new Foursquare account due to the auto login that PSC performs.
- Please Stay Calm saves your Foursquare (and likely other such as Facebook) settings. You can login and logout but you cannot point to a new account. If the password changes I do not know if you are prompted to enter a new password. Workaround: Uninstall and reinstall app is the only way I know to cleanly break the connection and log back in.
 Within the old system a Safehouse merely needed to have members willing to pour real money into the system. Get your Safehouse to level 8 and then dump mass amounts of supplies within the Safehouse storage until your number is bigger than the biggest Safehouse on the list. It meant nothing other than a pissing contest of who spent the most money. Zero effort in the game and in all reality it was possible for a Safehouse of one person at level one to be the top Safehouse on the list if that one person was insane enough to spend the money to do it. While many of us realized that this was the broken situation it was the debacle of particular Safehouse’s rogue member that really brought it to the front in many people’s eyes. She exposed just how valueless this list was, along with also exposing an exploit that was being used and resulted in trouble for more than a few including herself.
 CVC Survivor Rating is calculated by the sum of your level and skills, not including the Energy and Stamina skill. For example: At the time of this writing my CVC Survivor Rating is 155. That’s my level at 28 plus Hunting 15, Scavenging 27, Trader 28, Healer 28 and Duel 28. Ideally if I maxed all my skills I would have a rating of 168 however since my Hunting is half of what it could be and I haven’t maxed out Scavenging my rating is lower than the maximum.
 If your group cares about their position within the Leaderboards you are responsible for aiding with that value. Every member that does not max out their skills lowers the value of the Safehouse or Stronghold’s potential. Many Safehouses and Strongholds will not be concerned about this however those who consider themselves elite are going to start paying attention to their member’s stats. While Terry Fox will not be among those to chase after members I would predict that some of this has already occurred in some Safehouses and Strongholds and created divides among members. Those who formerly were on the top of the Leaderboards will continue to want to remain there. Overall membership will contribute and aid to the rating because ultimately this is a numbers game and a level ten with five points in each value is still worth more within the group than kicked out of the group.
